Key takeaways
- The home screen is now yours to arrange: banners, shortcuts, course shelves, notices and events, plus the cards learners already have.
- Each block can go to everyone, or only to learners in a batch, with a tag, or with (or without) a course.
- You edit a draft with a live phone preview. Learners see nothing until you publish.
- It is already in your admin dashboard: LMS, then Learner home.
Watch the tutorial (under 3 minutes)
The video has spoken steps and captions on screen. Download the video to share it with your team.
Think of a JEE coaching institute in Kota in the last week of November. A new crash course batch starts on 1 December. The scholarship test is on 7 December. Term fees are due on the 30th. The office has sent all three on WhatsApp, more than once.
Now open the app on a student's phone. The home screen shows their courses and their progress. It shows none of the three things the institute most needs them to know.
Until now, you could switch the home screen's cards on or off and add a custom card. You could not put a banner there, a dated event, or a message for one batch only. The new Learner home changes that. You arrange the home screen yourself, block by block, and choose who sees each block.
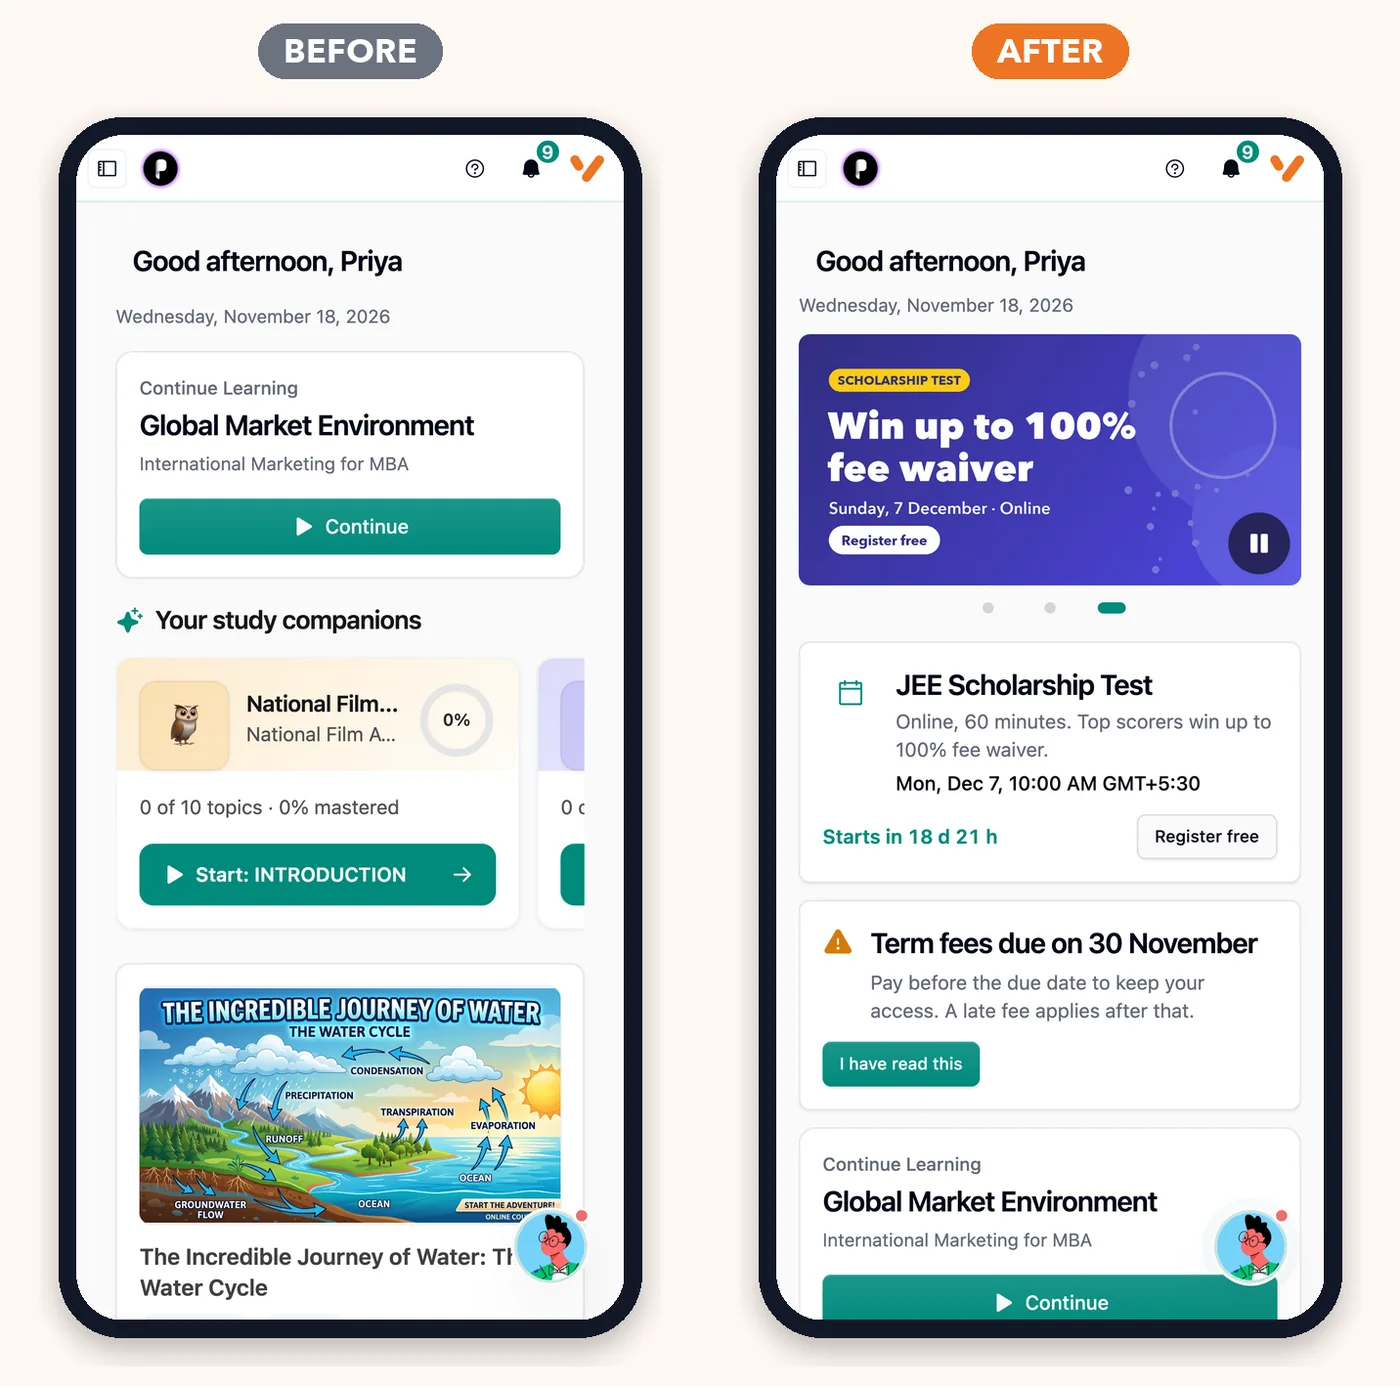
What you can put on the home screen
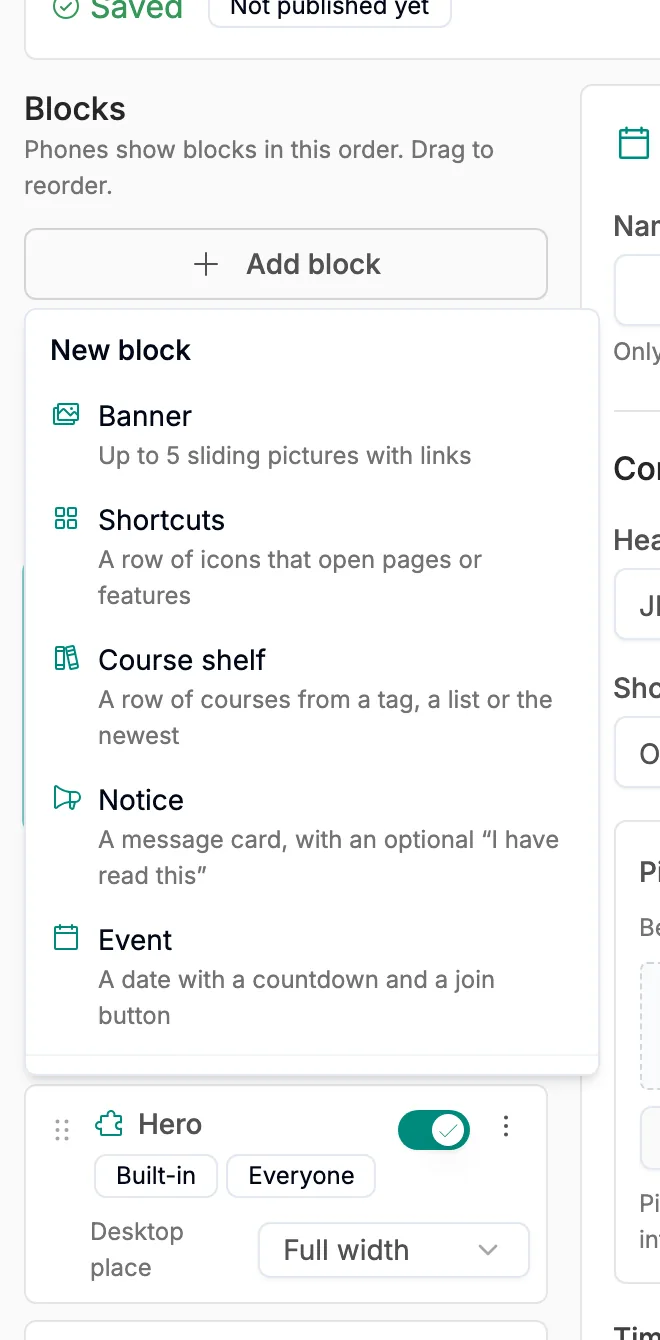
Banner
Up to 5 sliding pictures, each with its own link and dates.
Shortcuts
A row of icons that open a course, a page or a feature.
Course shelf
A row of courses from a tag, your own list, the newest or the free ones.
Notice
A message card, with an optional “I have read this” button.
Event
A date with a countdown and a register or join button.
Your current cards
Continue learning, My courses, live classes and the rest stay as blocks.
Every block, including your current cards, can be moved up or down, switched off, shown only on phones or only on computers, and given start and end dates.
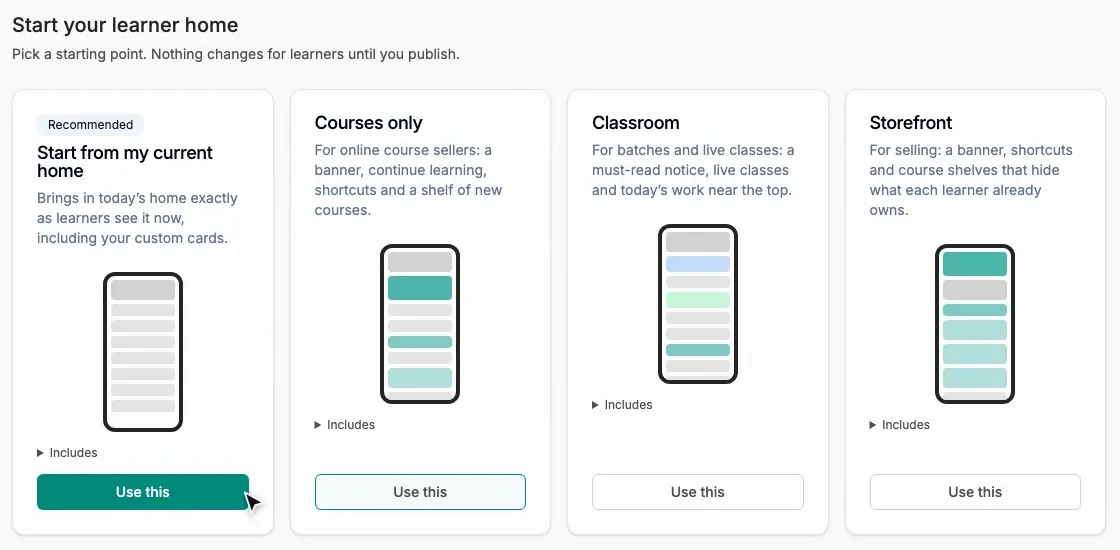
Open Learner home and pick a starting point
In the admin dashboard, open LMS, then Learner home. Institute admins can edit it. The first time, you choose where to start:
- Start from my current home brings in today's home exactly as learners see it, custom cards included.
- Courses only is for online course sellers: a banner, continue learning, shortcuts and a shelf of new courses.
- Classroom is for batches and live classes: a must-read notice, live classes and today's work near the top.
- Storefront is for selling: a banner, shortcuts and course shelves that hide what each learner already owns.
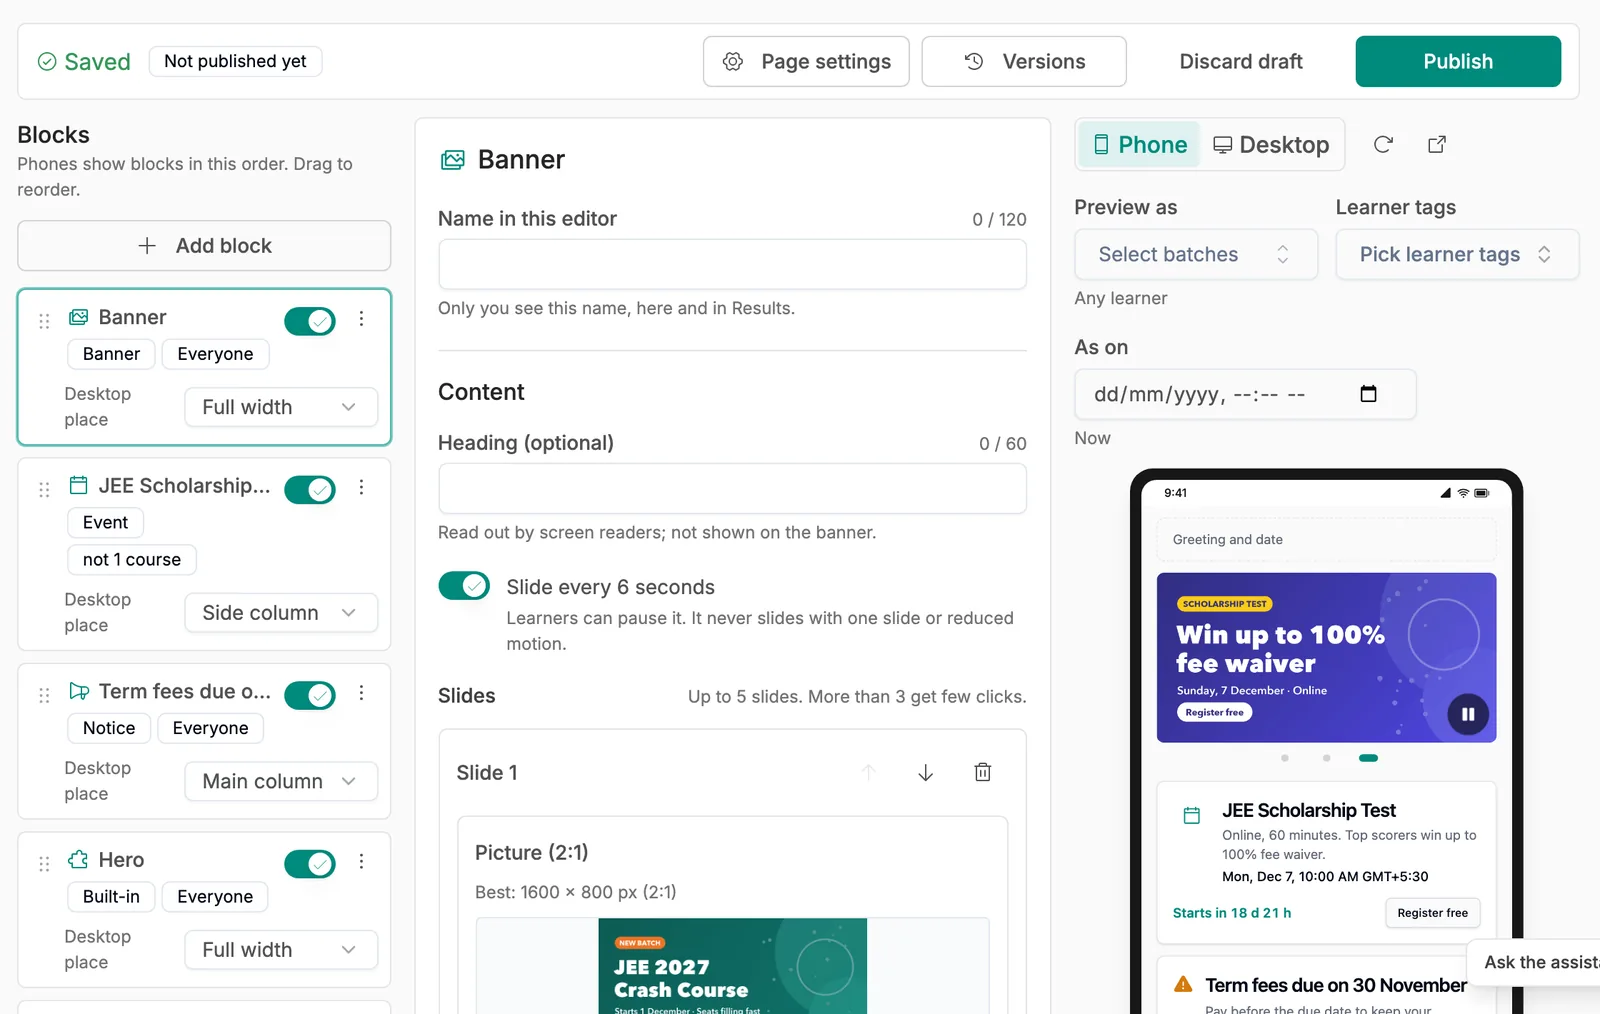
The editor opens with three parts: the list of blocks on the left, the settings of the selected block in the middle, and a live preview on the right. Your work saves as a draft while you type.
Add your banner pictures
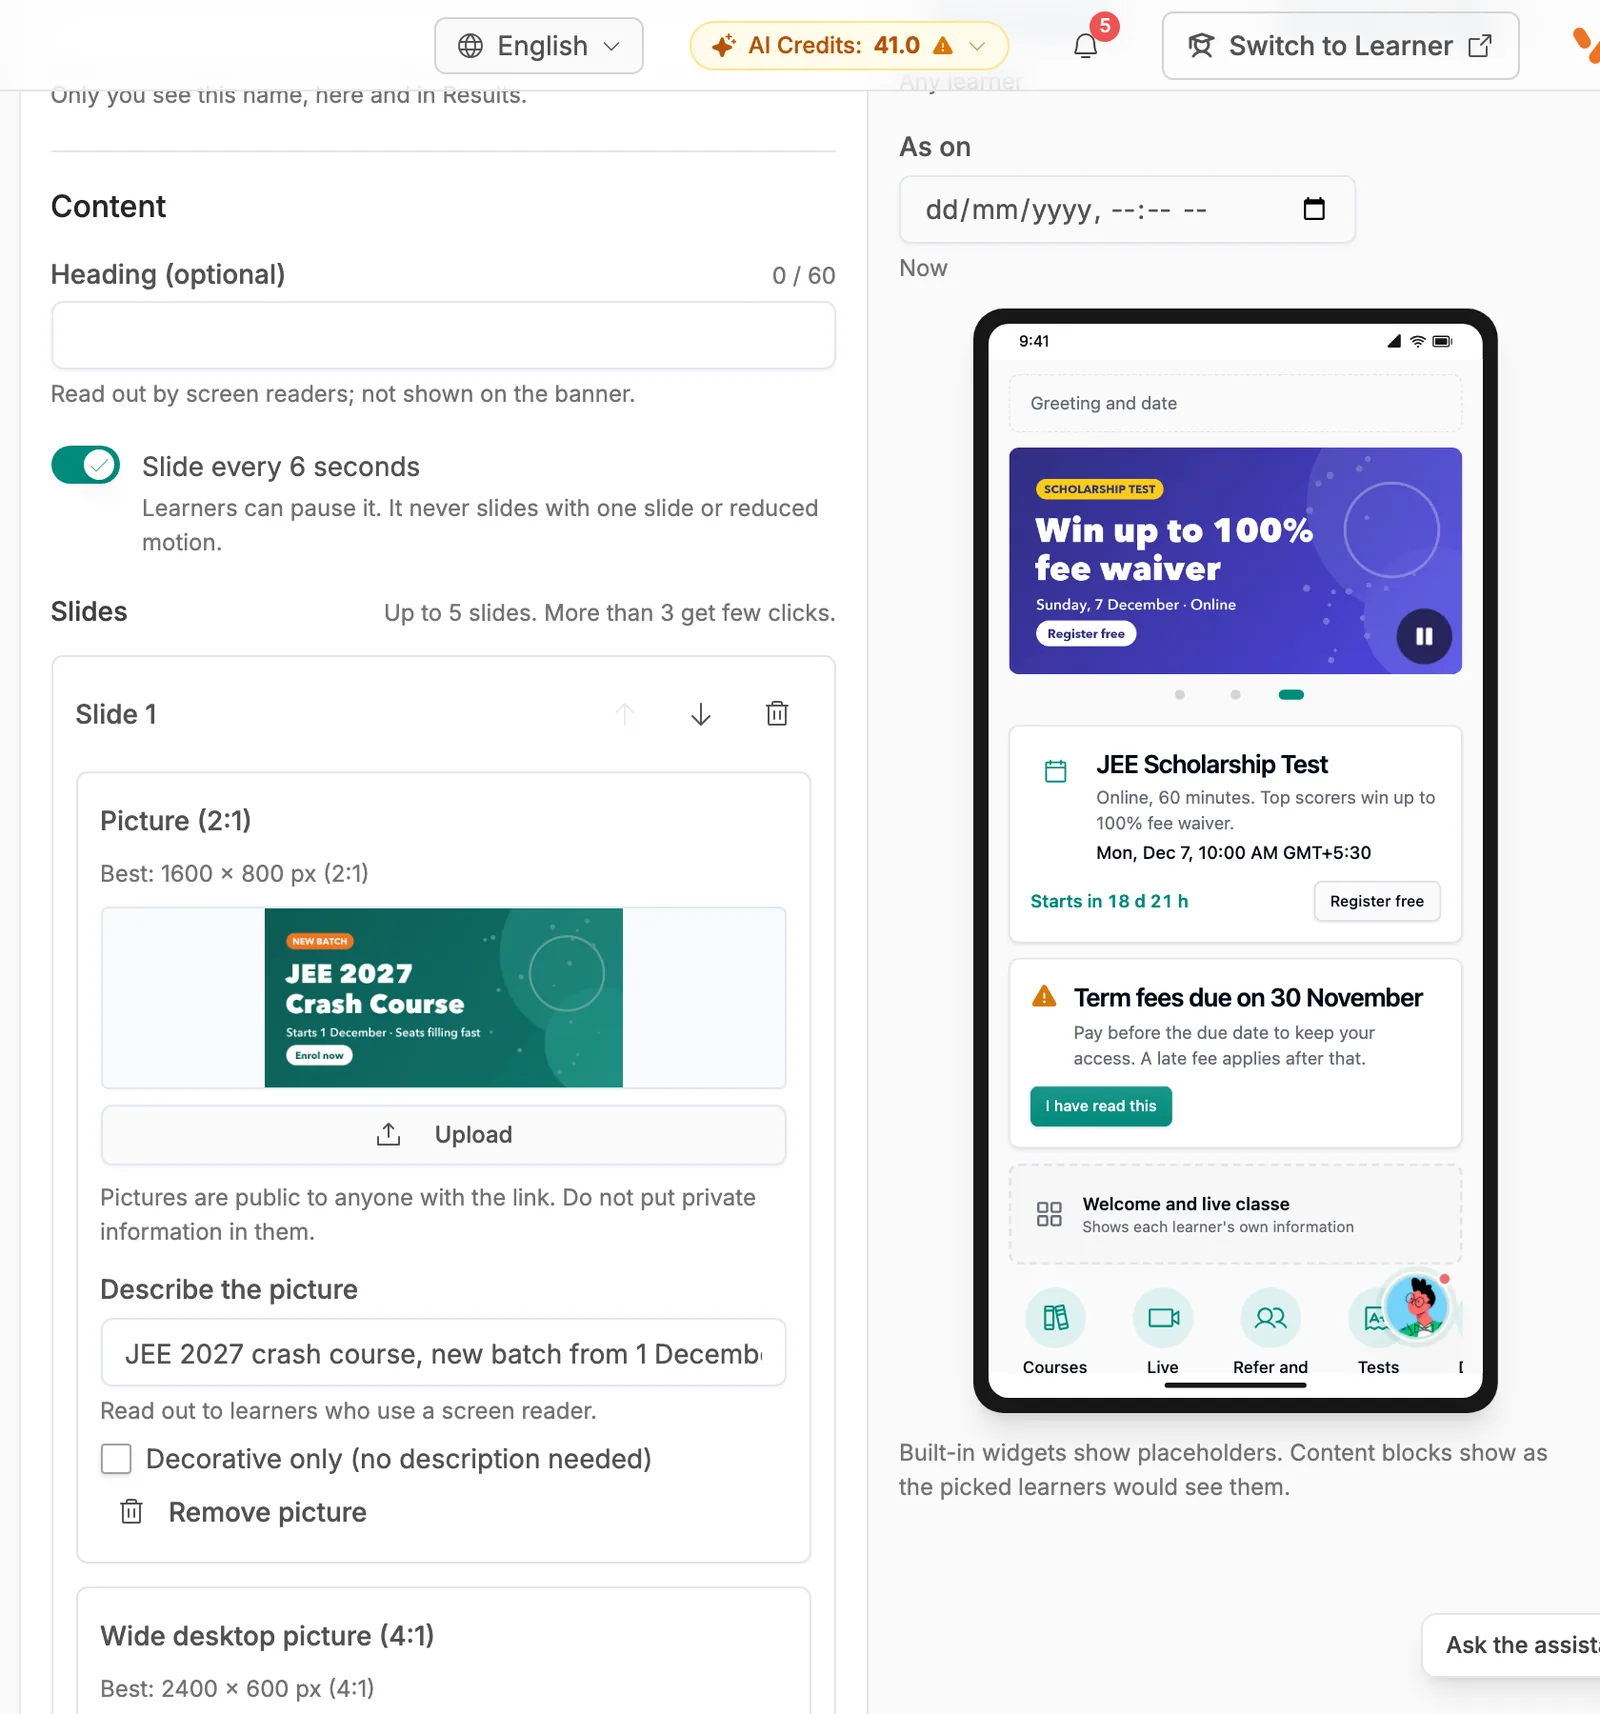
Select the Banner block and upload up to five pictures. The best size is 1600 × 800 pixels (2:1). You can crop while you upload, or use the picture as it is. Each picture shows up in the phone preview straight away.
- Slides change every 6 seconds. Learners can pause them. A single slide never moves, and neither do slides for learners whose phone is set to reduce motion.
- Each slide can have its own dates under “Show this slide only between”, so an offer can end by itself.
- Describe each picture for learners who use a screen reader, or mark it as decorative. The editor will not publish until you do one of the two.
Choose where each tap goes
Under each slide, pick what opens when a learner taps it: a course, a course list (all courses or one tag), a product page, a public live class, an assessment, a page inside the app such as Live classes or Reports, or a web address. In the video, the JEE slide opens the JEE course.
The same link choices work for shortcut tiles, notice buttons and event buttons. If a web link leads to a payment page, tick the box that says so. That link is then hidden in the iPhone and iPad app.
Set up shortcuts and course shelves
Shortcuts are a row of round icons: Courses, Live classes, Tests, Notebook, or anything you link. You can add up to 16. Phones show four at a time and scroll. A tile for an in-app page appears only for learners who have that page.
Course shelves fill themselves. Choose what the shelf shows:
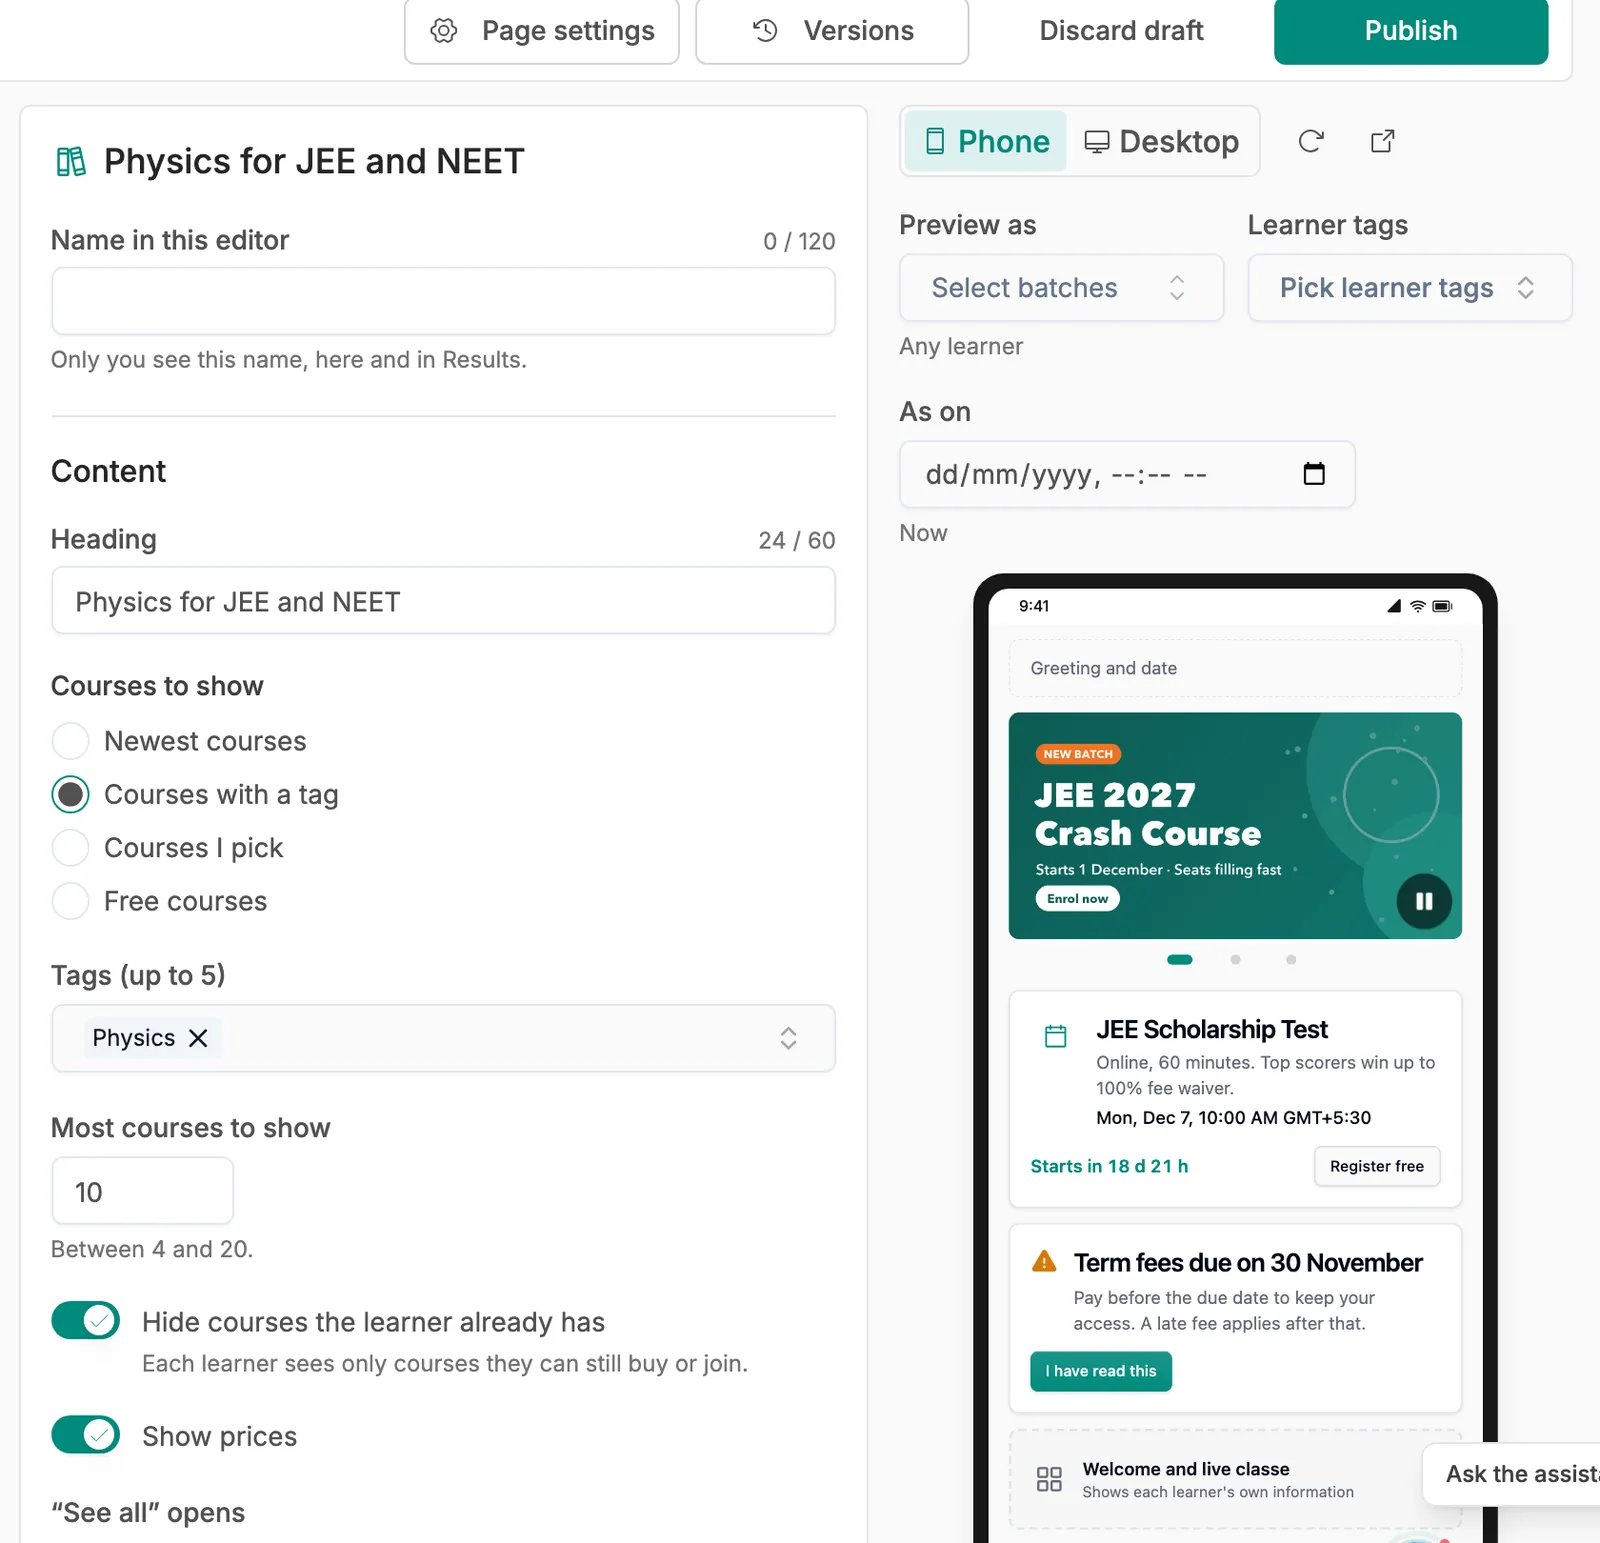
- Courses with a tag, up to five tags. Tag a new course “Physics” and it joins the Physics shelf by itself.
- Courses I pick, up to 20, in your order.
- Newest courses or Free courses.
Keep Hide courses the learner already has switched on. Then each student sees only courses they can still buy or join, so a shelf never wastes space on a course they already own. Shelves show only courses a learner could see in your course catalogue anyway.
Add a notice students must read
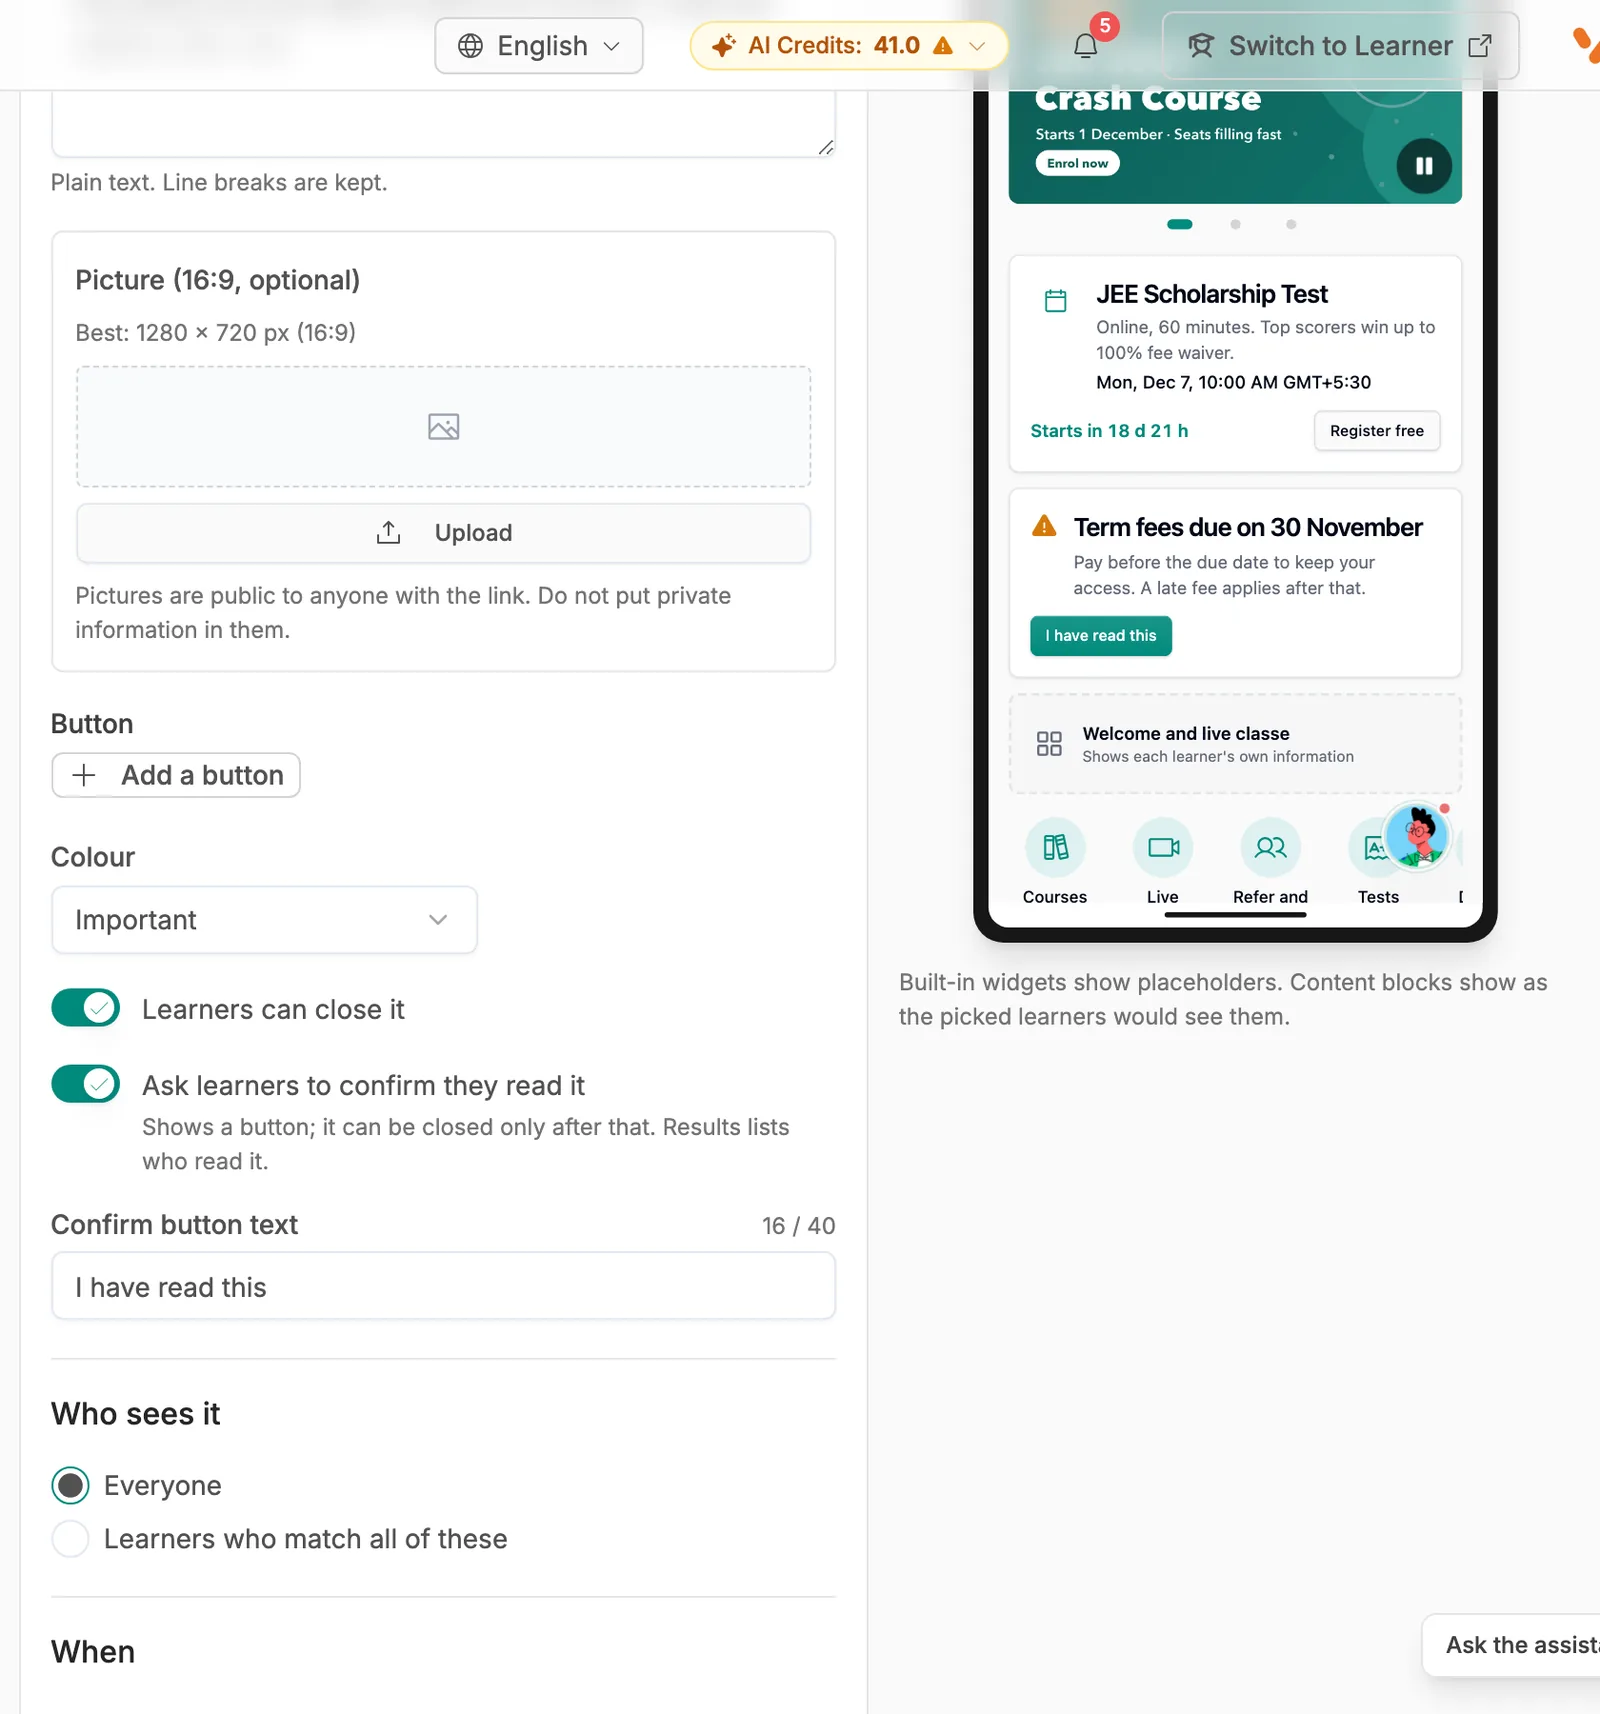
Press Add block and choose Notice for anything important: a fee date, a timetable change, an exam rule. Write a heading and a short message, then pick how it looks: Plain, Information, Good news or Important.
Switch on Ask learners to confirm they read it and the card gets an “I have read this” button. The learner can close it only after pressing it, and the Results tab lists who did. You can also add a button and a picture.
Add an event, for the right learners
An Event shows a date, a countdown and a button. Enter the dates yourself, or pick a public live class and the times come from it. The join button can appear up to two hours before the start, and the block hides itself when the event ends.
Now the part that matters most. Under Who sees it, choose Learners who match all of these and add up to five conditions:
- are in a batch you pick
- have a course, or do not have a course
- have a learner tag
In the video, the scholarship test shows only to learners who do not have the JEE course yet. Students who already paid do not see a sales message, and those who have not are reminded every time they open the app.
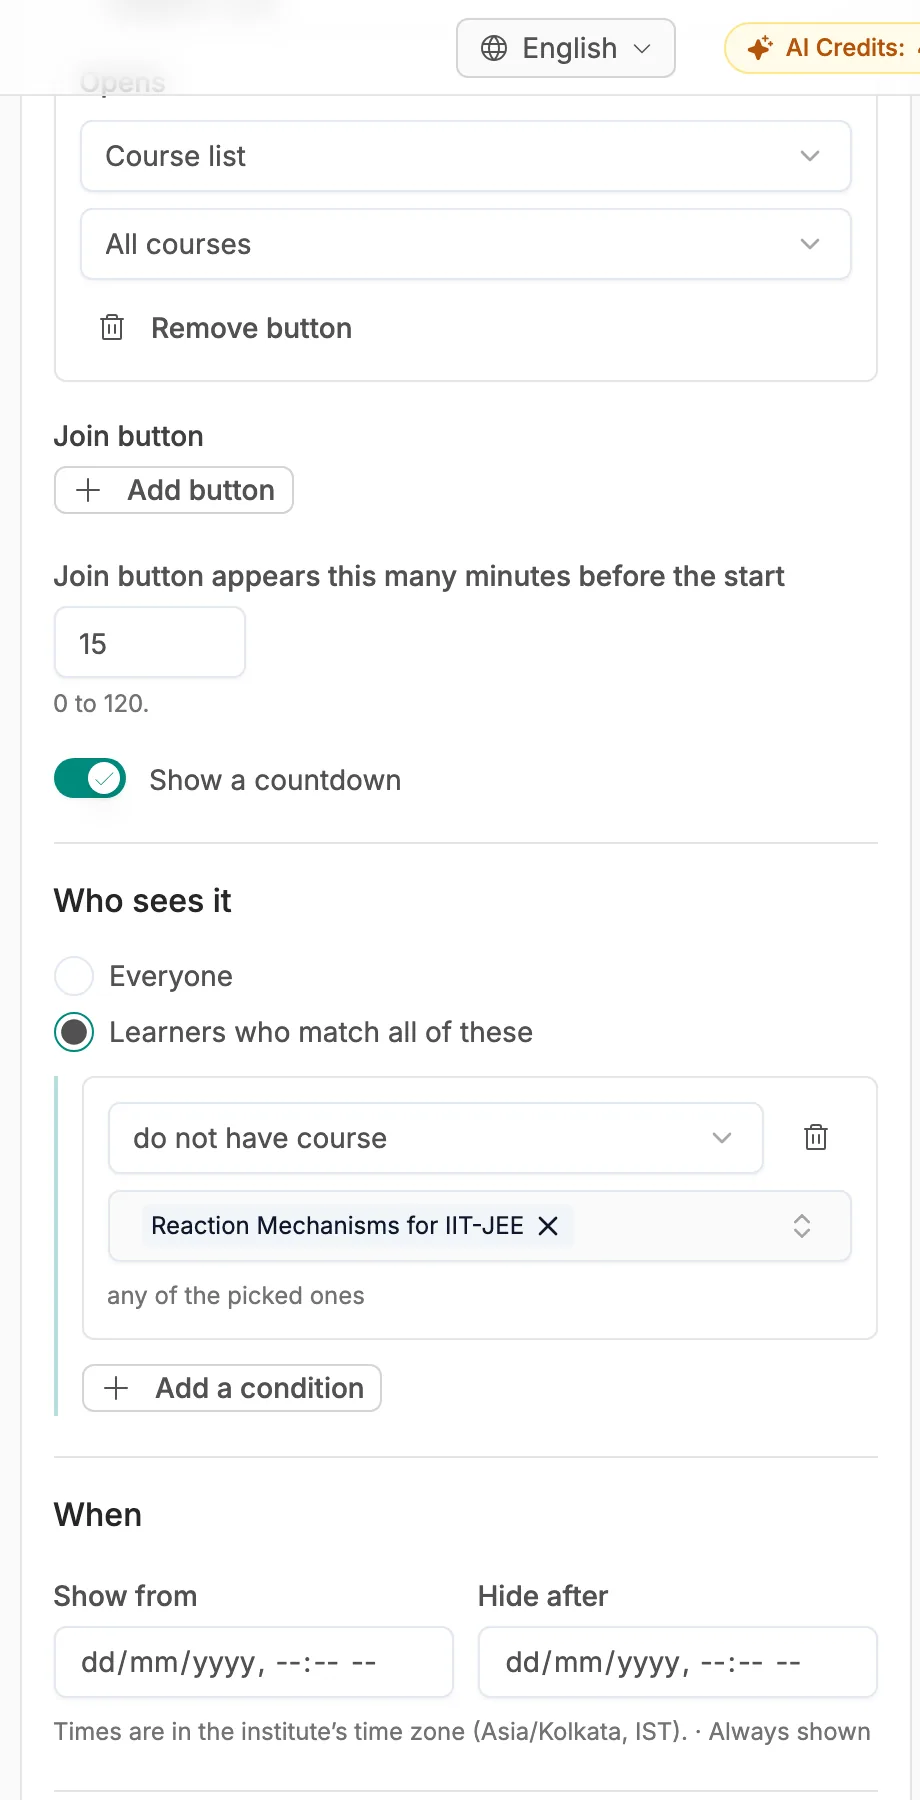
Below that, When sets a start and end time in your institute's time zone. Where chooses phones, computers or both, and the column it sits in on a computer. Phones always show one column, in your list order.
Preview it as different learners
The preview on the right switches between Phone and Desktop. Use Preview as to pick batches or learner tags and see what that group gets. Use As on to see the page on a future date, for example after an offer ends.
In the preview, your current cards (Continue learning, My courses and so on) show as labeled boxes, because they hold each learner's own information. Your new blocks show exactly as learners will see them.
Publish, and go back if you need to
Press Publish. Vacademy checks the page first. Anything that must be fixed, such as a slide with no picture, is listed with a Go to block link. Anything worth a look, such as a shortcut that only some learners can open, is listed too, but does not stop you.
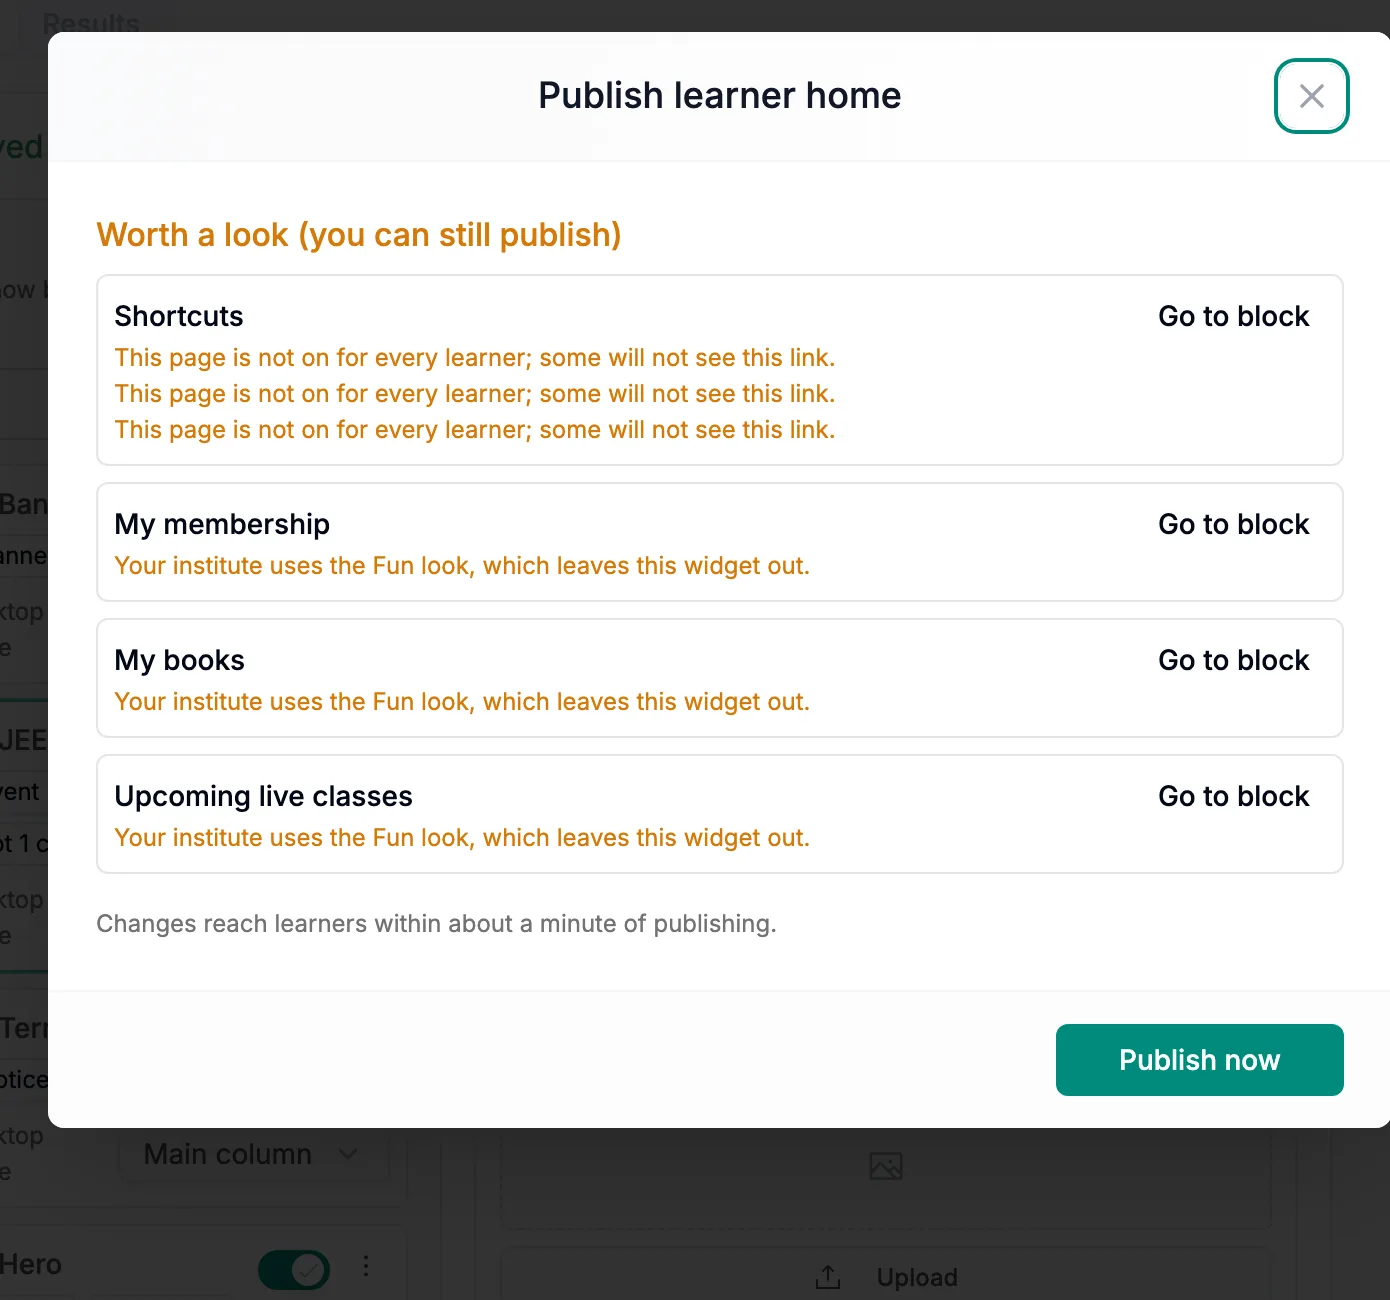
Learners see the new home within about a minute. Every publish is kept as a version, up to the last 20. Open Versions and choose Restore to draft to bring an older one back.
See what works
The Results tab opens after your first publish. For each block it shows views, clicks and click rate, on phones and computers separately. For notices it shows how many learners closed them, and who confirmed they read them. Pick the last 7, 30 or 90 days.
What your learners see
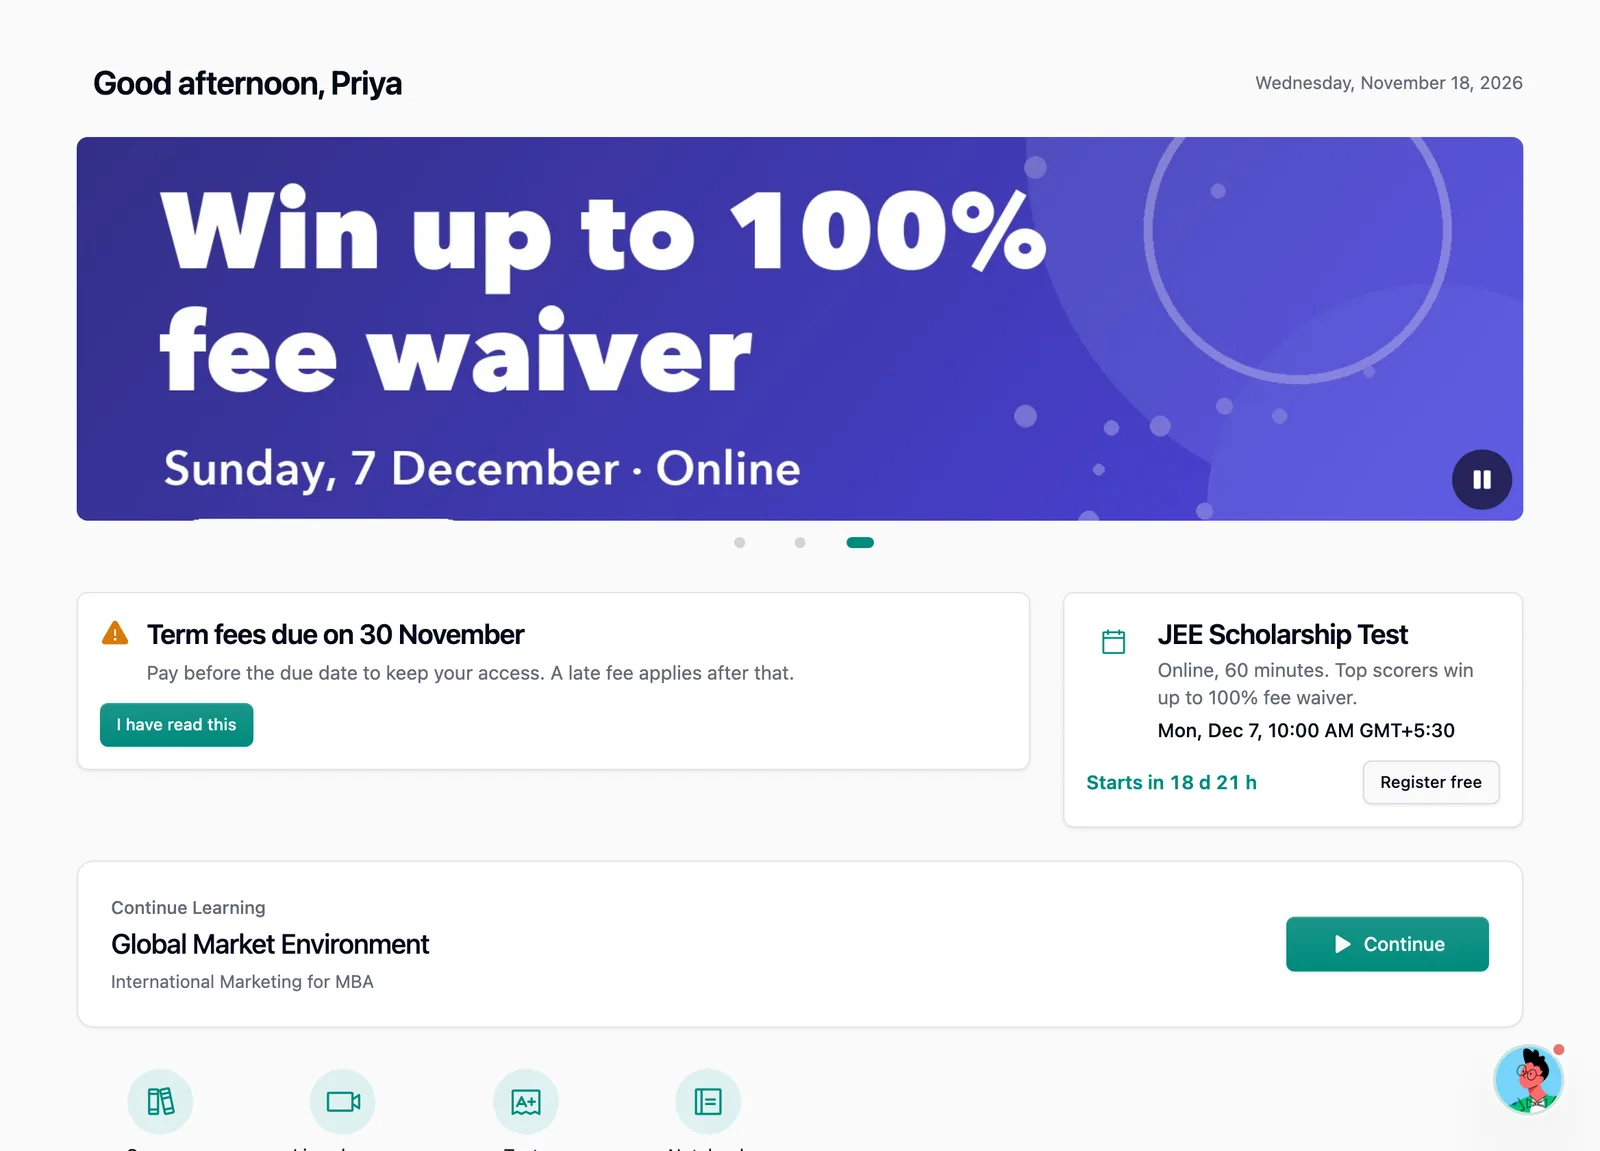
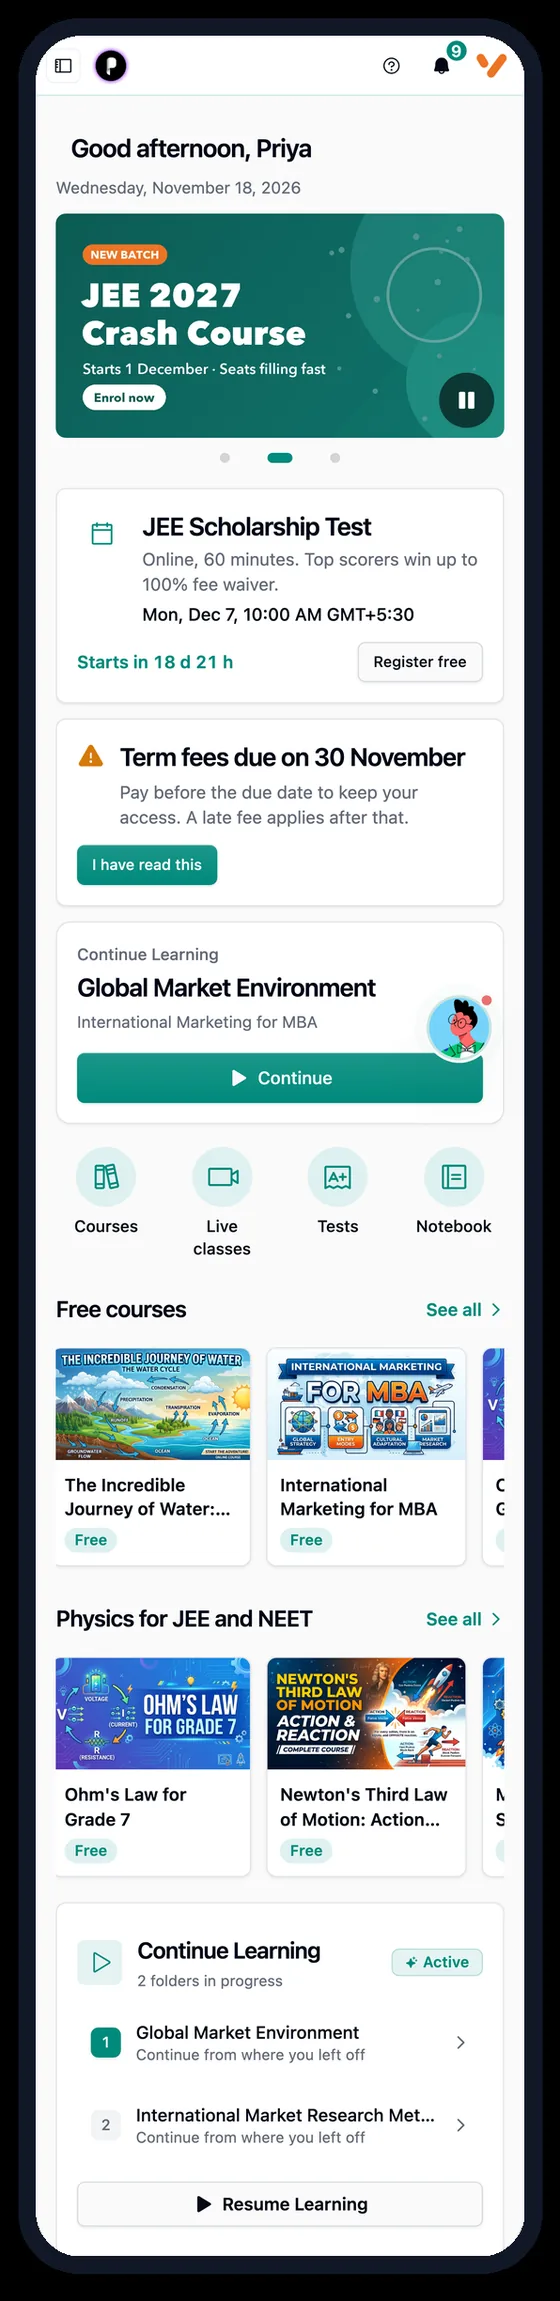
Here is the finished home on the test learner's phone. At the top is the banner, then the scholarship test with its countdown and the fee notice. Under them is the student's own Continue learning card, the shortcuts, and the course shelves.
Nothing on this screen needed a developer or a new app release. When the scholarship test is over, the event hides itself. When the fee date passes, end the notice or change it for the next one.
Good to know
- Who sees it applies to the whole block. To show one slide to one batch only, put that slide in a second banner block.
- Pictures are public. Anyone with the link to a picture can open it, so do not put private information in banners.
- Tested in the browser first. We tested it in the browser on phones and computers. We are still checking the Android and iOS apps.
Running a JEE program? The same home screen pairs well with mock tests that look like the real exam: put next Sunday's mock on a banner and send students straight into it.
Questions institutes ask
Do learners see my changes while I am still editing?
No. Everything you change is saved as a draft. Learners keep seeing the current home until you press Publish. After you publish, they see the new home within about a minute.
Who can change the learner home?
Institute admins. The editor is in the admin dashboard under LMS, then Learner home.
Can I show a banner to only one batch?
Yes. Open the block, go to Who sees it and choose Learners who match all of these. You can pick batches, learner tags, courses a learner has, or courses a learner does not have. The rule applies to the whole block, so put a batch-only slide in its own banner block.
Will my current home screen be lost?
No. Start from my current home brings in today's home as it is, including your custom cards. Your existing cards, like Continue learning and My courses, stay as blocks you can move or switch off.
Can I go back to an earlier version?
Yes. Every publish is kept as a version, up to the last 20. Open Versions and choose Restore to draft. Learners see it only after you publish it again.
What size should banner pictures be?
1600 × 800 pixels (2:1) for phones. For computers you can add an optional wide picture of 2400 × 600 pixels (4:1). Without it, the phone picture is cut to fit on wide screens.
How do I know if learners use it?
Open the Results tab. It shows views, clicks and click rate for each block, phone and desktop separately, how many learners closed a notice, and who confirmed they read it. Numbers start on the day you publish.
Want us to set up your first home screen?
Tell us your next batch, test and fee date. We will build the home with you on a call.